CMS with Live Preview (Grid, Drag & Drop, WYSIWYG)
The CMS plugin “CMS with Live Preview (Grid, Drag & Drop, WYSIWYG)” simplifies content creation in Shopware 6 with a user-friendly interface and true live preview. It addresses typical challenges of Shopware’s Shopping Experiences, such as the lack of a live preview, unintuitive operation, and the need to create a separate layout for each new landing page.
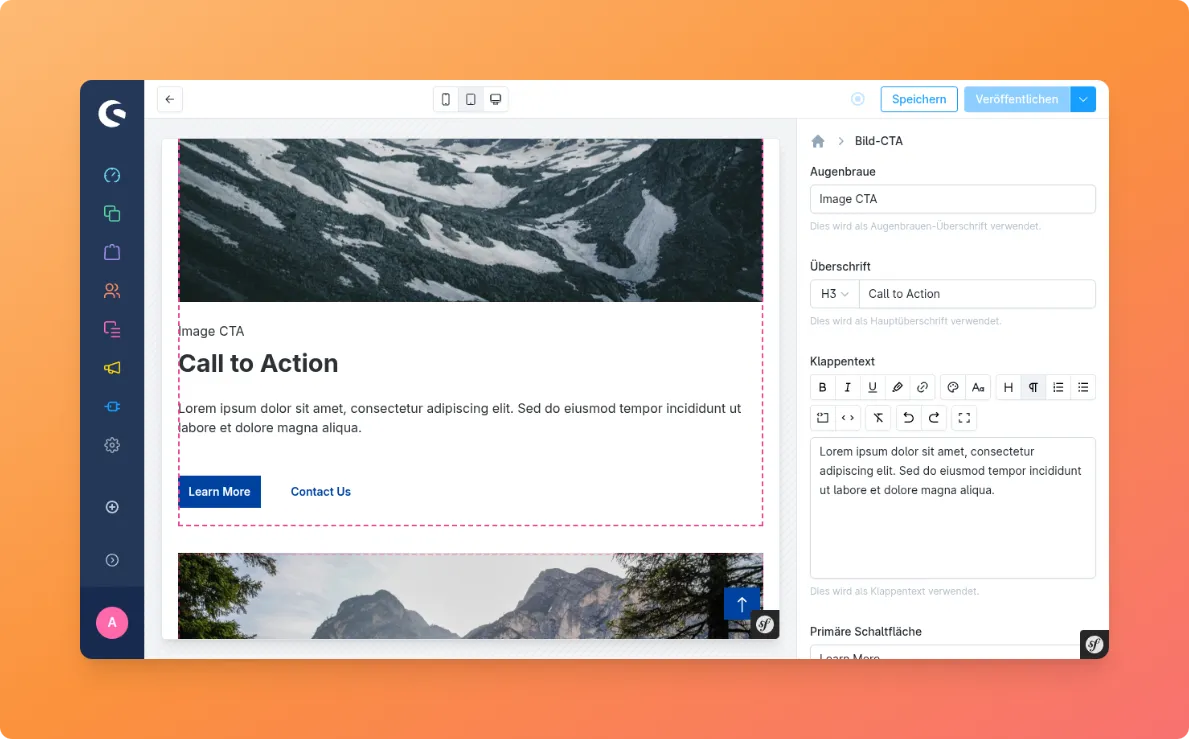
By adding the “Slot” element, individual content can be maintained directly for products, categories, or other entities. With numerous components such as banners, product sliders, or FAQ accordions, the plugin optimizes content management and enables flexible design.
For additional or customized components, the plugin’s support offers quick solutions.
Open Plugin in Shopware 6 Store
First Steps
Installation
Composer
Generally, we recommend always installing Shopware plugins via Composer. Your Shopware installation must be authenticated once. You can find instructions in the Shopware Documentation. Once you have done this and purchased our plugin from the store, you can install it with the following commands:
-
Add the plugin to your Composer dependencies.
Terminal window composer require [store.shopware.com/cobcontentblocks](https://www.google.com/search?q=https://store.shopware.com/cobcontentblocks) -
Update the plugin list.
Terminal window bin/console plugin:refresh -
Install and activate our plugin in one step.
Terminal window bin/console plugin:install --activate CobContentBlocks
Shopware Administration
Alternatively, you can of course install and activate the plugin via the usual way under the menu item My Extensions.
Content Management
Content Editor
With our plugin, you can manage content on landing pages, categories, and product pages. However, you must include a slot in the Shopping Experiences layout.
-
Open the desired layout under
Content→Shopping Experiencesor create a new one. -
(Optional) Create a new section in the layout. Here you can also decide via the
Size Modesetting whether the components are displayed across the full width of the browser or placed within the container (centered content). -
Add the
Slotblock from theContent Builderblock category to the layout. You can also give the slot a name via the gear icon in the visual editor. At this point, you can also define distances to other blocks.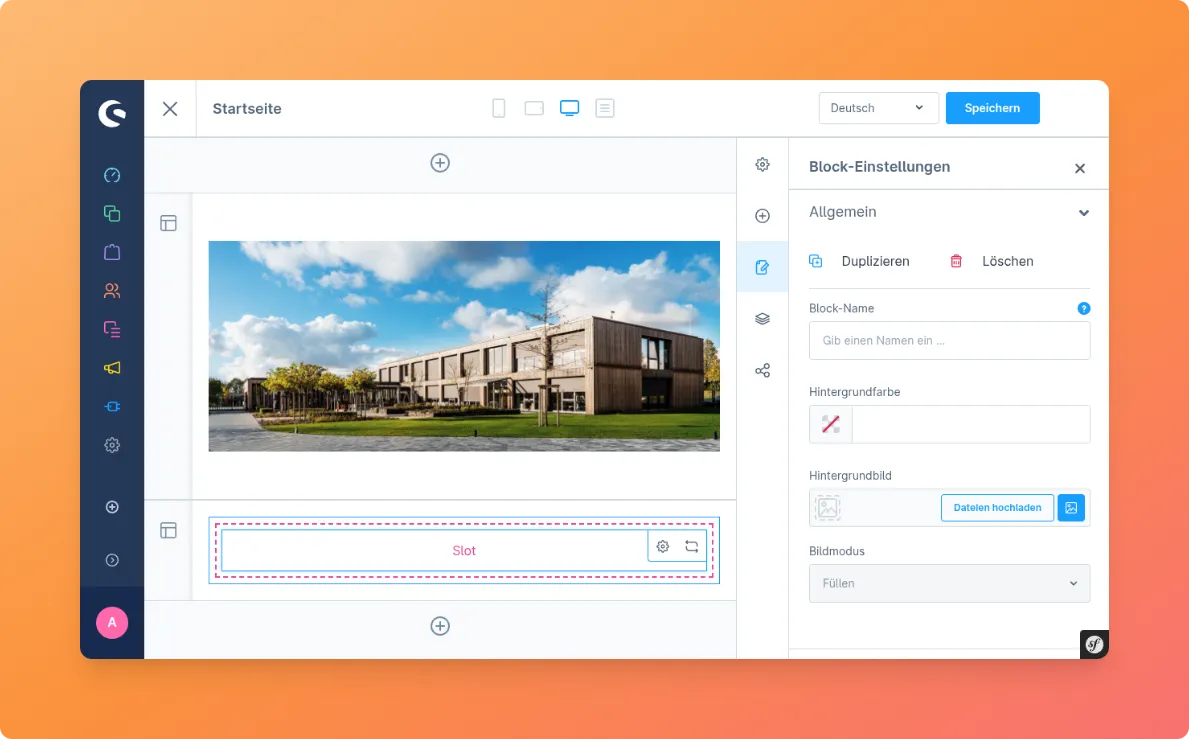
-
Save the changes to the layout.
-
Now open an entity (e.g., category, product, landing page) in the administration that uses this layout. Open the
Layouttab there. Alternatively, you can also assign the layout of this entity here.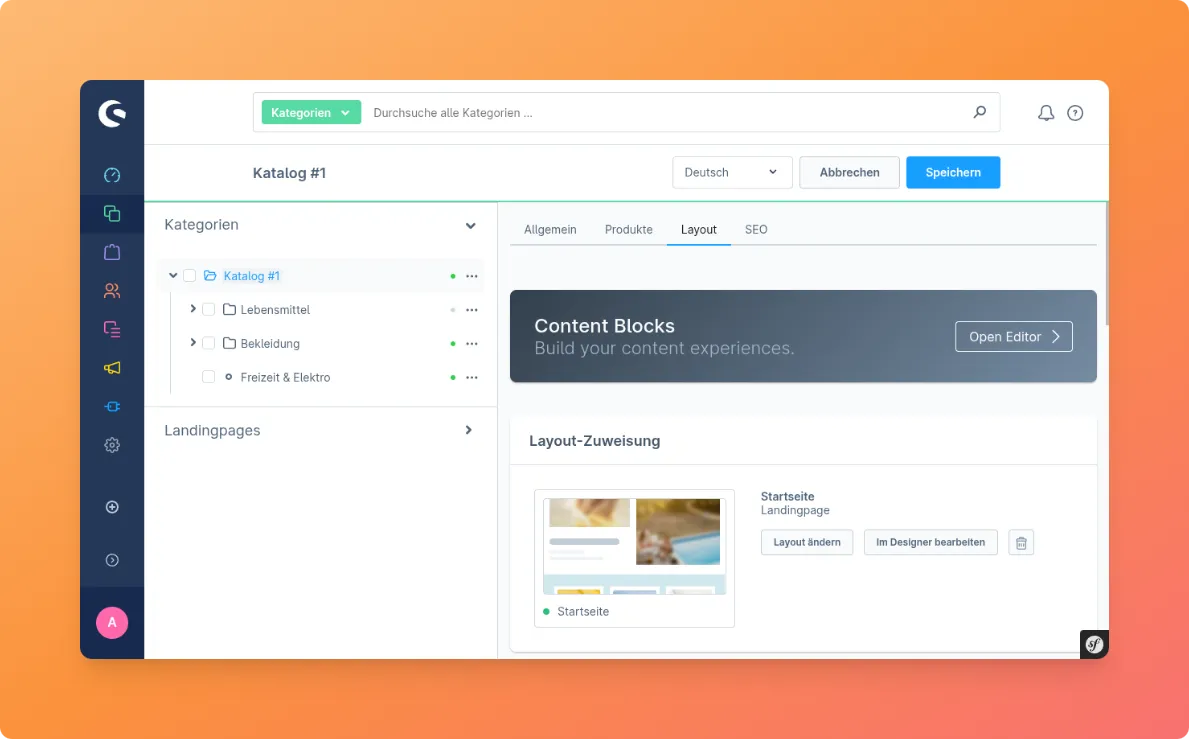
-
Open the Content Editor via the
Open Editorbutton. -
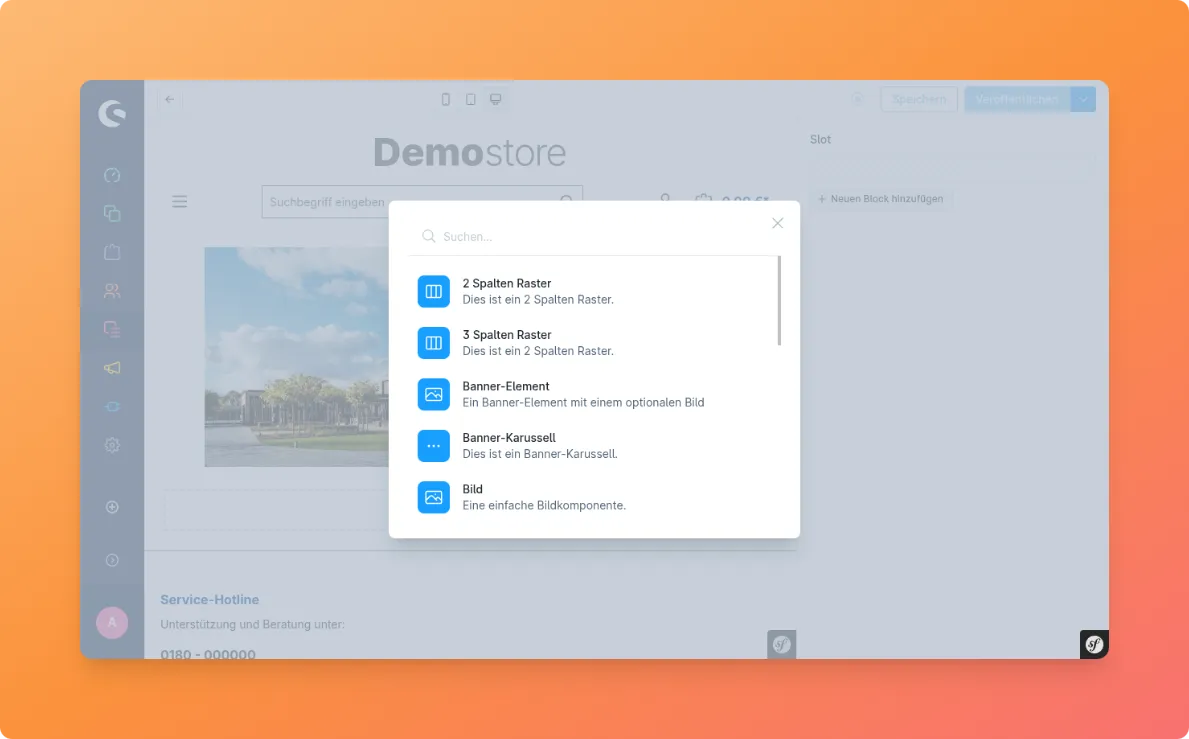
Use the “Add New Block” button to access the component selection. Here you can choose between many available blocks. To get a preview, you can hover the mouse over the entry. Click on an entry to insert it.
-
On the right side, you have the option to customize the content of the currently inserted block. The preview updates in real time. To add another block, go back one level by clicking on the
Homeicon in the breadcrumb in the same view. -
Save the page at the top right using the
Savebutton. -
You can open a preview via the dropdown next to the
Publishbutton. A new tab will open. You can also send this URL to your colleagues. The customer does not yet see these changes. -
If you are satisfied with your changes, you can publish the changes via
Publish.
Tips
Using HTML and Twig in Text Fields
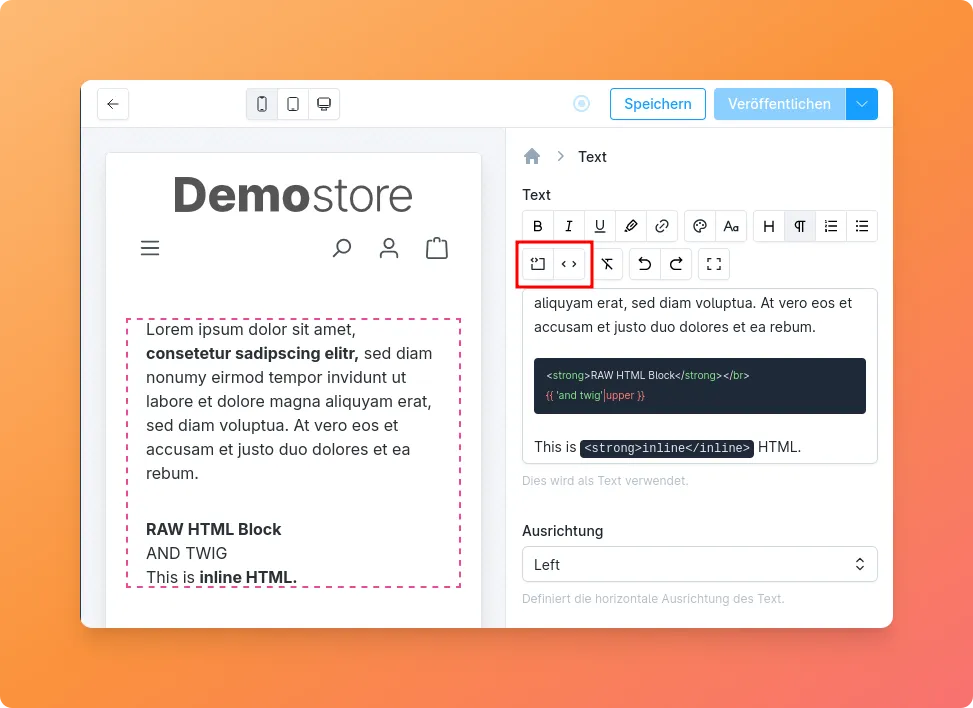
You can also use HTML and Twig in the text fields of the Content Editor to design your content. Simply click on the Code Block or Inline Code button in the editor to activate the corresponding mode.
Afterwards, you can enter or paste the desired code.
Maintaining Email and Phone Links in Text Fields
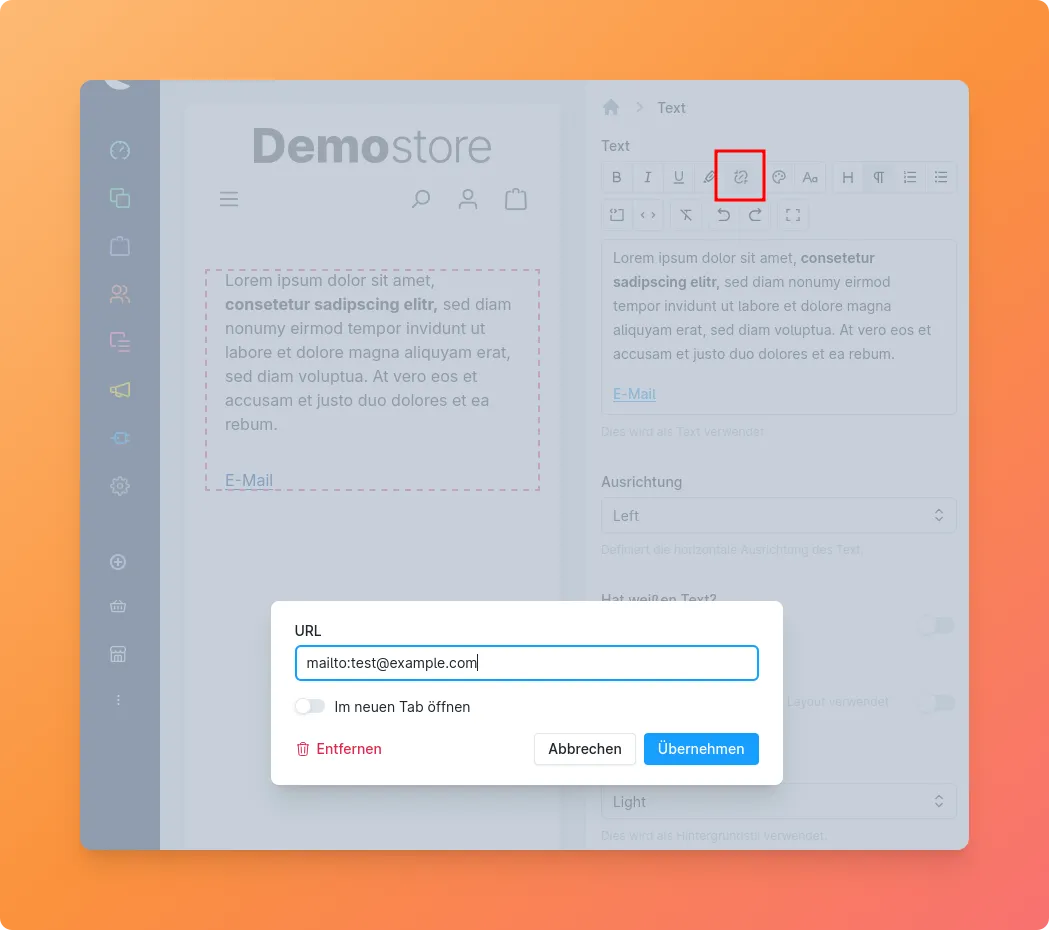
To create an email or phone link in the text fields of the Content Editor, you can use the regular link function.
You just need to use mailto: for email links and tel: for phone links as the prefix.
Maintaining Buttons in Text Fields
Currently, buttons cannot be added directly in the text fields of the Content Editor. However, you can simply insert the HTML for a button into a code block:
<button class="btn btn-primary">Button</button>You can find more about the available button classes in the Bootstrap 5 documentation.
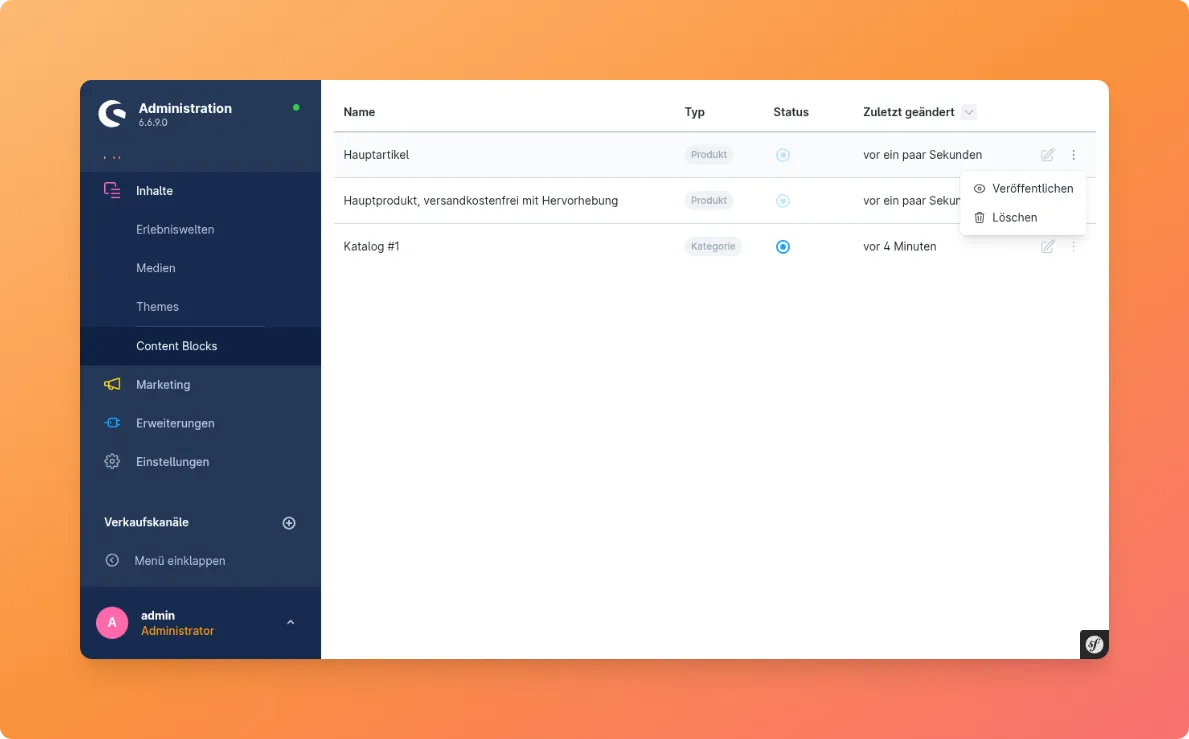
Content Overview
Under Content → Content Blocks you will find a list of all the pages you have maintained. From this view, you can publish, delete, or deactivate the content. You can also open the Content Editor directly from here.
